 Thanksgiving is fast approaching. As we head into the fall entertaining season, I thought I would share some of my professional food preparation tips and tricks to make your holiday more enjoyable.
It’s easy to tell the second you walk in the door to a dinner party whether things are (or, more likely, are not) under control. Out-of-control meals take away from the guests’ and the hosts’ experience. Believe it or not, it is possible to get your entire holiday meal prepared and to the table while it’s still hot — without your guests ever seeing you sweat. Great cooks and chefs seem to do it all the time. With these tips, you can too.
The truth is that culinary professionals probably worry much more than the average person about how food experiences will turn out. We worry more due to increased expectations on the part of our guests, and due to our personal belief that — whether we are doing Thai night or casual burgers — they better be darn good, if not the best you ever had. That’s why we do whatever we can to ensure success before you get there — just like in a restaurant. A little pre-planning makes all the difference.
Here are my top six tips for a victorious Thanksgiving meal, with little to no stress. (I suggest combining them with a whole week off from work, which is my preferred modus operandi).
Six No-Stress Tips for Fall Entertaining
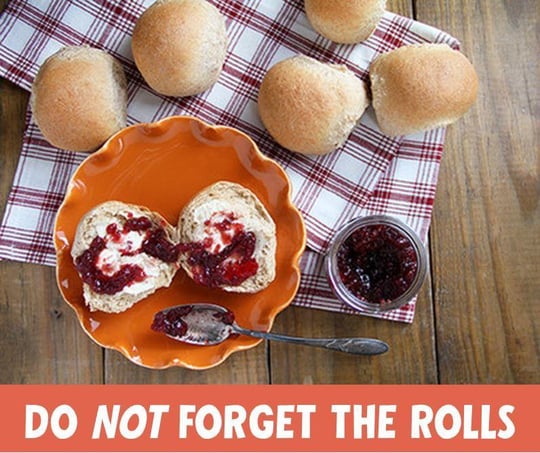
 1. First, an obvious shortcut to success is to pre-order your dozens of soft, buttery Virginia Rolls from your local Great Harvest bakery. Come Thanksgiving, all you have to do is warm them up. Use them to sop up some gravy and cranberry sauce and you’ll soon see why these are on my list of holiday meal must-haves.
2. Start prepping and shopping on Sunday and don’t look back. All the best cooks are at the grocery store the weekend before. The only thing you should be running out for on Wednesday are your Great Harvest rolls (see above) and perhaps some greens that wouldn’t hold up. Standing in line at Whole Foods on Wednesday afternoon to pick up your still semi-frozen turkey is amateur hour, and it will be hard to ever catch up. Three to four days ahead of the big day I’m making stock, chopping vegetables for the stuffing, caramelizing onions, making pie dough and cranberry orange relish, brining the turkey (see below), and candying nuts for the salad and cheese plate.
3. Dry-brine your turkey. Seriously, this is the most essential thing you can do — but you have to have your ducks (er — turkeys) in a row ahead of time. This must happen on Sunday or at the very latest Monday morning. I have talked about dry-brining before (thanks, Judy Rogers!) but doing it to your Thanksgiving turkey can transform your week. Succulent, juicy, deeply seasoned flesh and crispy, crackly skin that is a burnished mahogany . . . isn’t that what the bird is supposed to be about? No more messy buckets, ice baths, or contaminated, leaky vessels at the bottom of the garage refrigerator. Simply rub your turkey inside and out with a generous amount of kosher salt, pepper, and spices of your choice and just wait. It’s that simple. For a how-to on dry-brining see here or here.
4. Don’t bring your stuffing to the bird; bring your bird to the stuffing. Dressing, stuffing, savory bread pudding, whatever you want to call it — if you are still shoving it into the cavity of your turkey the night before cooking and praying to the food-safety gods that nobody gets salmonella you are playing with fire. Besides the fact that it never really gets any other texture to it except for soggy and just contributes to the turkey taking longer to cook through and dries it out in the process (sorry, Grandma Jean . . .). What can you do to ensure a delicious, safe stuffing with
contrasting textures that is filled with roasted poultry flavor? Follow this simple how-to:
A. Pick your favorite stuffing recipe; make it the day before, and place in a casserole dish or roasting pan and tent with foil.
B. On the big day, when the turkey is almost done cooking, place the stuffing in the oven and bake for thirty minutes or so. Open up the oven, peel back the foil and use either a turkey baster, ladle, or spoon to drizzle a generous portion of the drippings over the top of the stuffing.
C. Replace foil, bake for another 20 minutes or so and then repeat your drizzle and return the pan to the oven without the foil to crisp up the top. Voilà! Stuffing that tastes like your turkey, with a crispy top and no risk!
5. Turkey is best done ahead and allowed to relax. Don’t fall into the trap of wanting your turkey to come out of the oven hot and gleaming right before you want to eat. That turkey needs to sit at least an hour or even two hours to really come into its own before you start to carve it. Besides, there is enough to do at the last minute, especially if you only have one oven. I pull the turkey at 165° in the deepest part of the breast, transfer it to a platter, and tent it with foil (okay, I usually peel a piece of crispy skin off the back first and/or eat the little tail first – nobody will ever know). The juices will be reabsorbed, and your slices will hold up much better when you carve the meat. So get up in the morning, get that turkey in and get ‘er done!
6. Have a way to hold hot sides. This could be a gas grill outside or even a large cooler with dish towels and 3 inches of boiling water at the bottom. This works surprisingly well for holding things like mashed potatoes and casseroles warm while you put the finishing touches on the roasted root vegetables, pancetta wrapped roasted fennel wedges or even a soup you just don’t have the burner space for. It is a chef’s trick that has saved me on many occasions.
What are some of your favorite ways to ensure Thanksgiving success? I’d love to hear about them in the comments section below.
Find your Local Great Harvest bakery here:
And contact them directly to order your holiday rolls.
Here are some other posts you may find helpful for successful fall entertaining:
- Applying the Culinary Concept of Mise en Place to Business & Life
- Beets 2.0: An Elegant Roasted Beet Appetizer to Impress Holiday Guests
- Fall Baking: Meg’s Pear Almond “Tart” Pie


